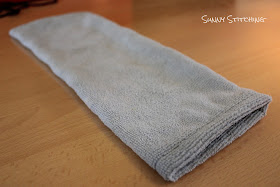
A month or so ago, my husband gave me some rags and a bag he uses to store his paintball lenses. He asked, "Do you think you could make this from these?"
Today I did.
This is my first ever tutorial that will shows how to make a bag (or two) from some old rags.
I started by gathering my materials: some old rags, shoelaces and the original bag.
Then I folded one rag in half and placed the original bag on top, making sure to line up the long side of the bag with the folded edge of the rag.
Next, I followed the edge of the original bag and cut out the rag. I made sure to leave 1/2 inch from the edge of the original bag so that the "rag bag" would be slightly larger.
This is after I cut out the rag.
I then pinned the cut edges and sewed them together with a straight stitch (1/4 inch seam).
Next, I used a zigzag stitch along the edge to help prevent fraying.
Then I folded the open edge down, making sure to leave enough width for the shoelace that went through it later AND included 1/4 inch seam allowance.
Sewed along the edge (1/4 inch seam allowance).
Next, I turned the bag right side out.
To make a drawstring, I began by deciding how far apart I wanted my drawstrings to come out of the bag. I decided on an inch apart. I pinched and cut on each side of the seam. Cuts were 1 inch apart. I repeated the same on the opposite end of the seam.
Then I strung my shoelace through a safety pin and inserted it into one of my cut holes. I then proceeded by carefully pushing the safety pin all the way through the seam...
...and brought it out at the hole cut near the first hole.
I tied a tight knot so that the lace is secure and will not slide out.
I took another shoelace, strung it through the safety pin, inserted the safety pin into the hole on the opposite side of the opening seam and repeated pushing it around until it came out of the nearby hole.
I tightly tied the two ends together on this side with a knot. I was then able to pull the two knots to close my finished bag.
Then I went and made a longer yellow one!
As I'm writing now, I have no idea where the bags have disappeared to, but I'm assuming they were what my husband wanted and he's put them away with all his paintball gear. That makes me smile.
If you make one, I'd love to see it. Feel free to share a picture on my flickr group: http://www.flickr.com/groups/sunnystitching/
If you make one, I'd love to see it. Feel free to share a picture on my flickr group: http://www.flickr.com/groups/sunnystitching/


Jessica, GREAT JOB on the tutorial!...It is so simple and easy to follow. How awesome you could use the mat and rotary cutter and your zig zag stitch is perfect. I struggle with the zig zag stitch. Love to you and thanks for the posting!
ReplyDeleteNow will you make me a bag like that to hold my surfboard?
ReplyDelete-Joel
Joel,
ReplyDeleteOnly if you have a large enough rag ;)
Jessica, will you make me a bodyboard bag out of my old jeans and old t-shirts in a zig-zag, quilting pattern so I can see it on the beach when I'm out in the water...
DeleteI really liked your tutorial!!!
Great idea! That can be one of my summer projects when I come to visit.
DeleteSounds like a very successful project, which effectively cost you nothing!!! Easy to follow tutorial... thanks for sharing!
ReplyDeleteNo problem! I'm glad you thought the tutorial was easy. It's always great to hear what people think about my tutorials. Thanks!
Delete